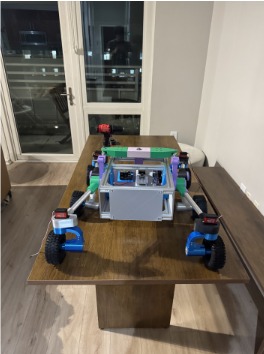
The GWU Robotics Rover is a project that stemmed from a different personal project I was working on during my sophomore year (Pictured top left). I began working on a fun rover project to learn more about different kinds of suspension mechanisms, specifically the rocker-bogie suspension system. The first iteration of the rover was a scaled replica of the Mars Perseverance Rover. In order to determine geometry, I downloaded the 3D model from NASA's website and scaled it down in Blender so that the wheel diameter was appropriate for my project. I then measured all other critical dimensions of the rover and began modeling the rover in SolidWorks.
For the body of the Rover, I decided to use 20/20 aluminum extrusions to provide a rigid and lightweight structure to house electronics and also allow for easy access to modifications and additions to the rover for future iterations. Two Rectangular frames were constructed using these extrusions and were connected by a central 3D-printed member that would also be used to attach the legs of the rover. On the top half of the body was a a printed differential that connected each set of legs. This is done to ensure that each wheel maintains contact with the ground at all times to maximize traction and stability.
Each wheel was equipped with its own low-gear DC motor. I used these because it was what I had on hand. While I could have opted for a tank steering system, I ended up placing servo motors at each corner wheel to control the direction of the rover. I did this so that there was more fine-grained control of the rover, especially in edge cases where more traction could be gained from turning the wheel to the side.
The rocker and bogie joints were both equipped with sealed ball-bearings to ensure smooth rotation between components. The lower bogie joint was connected to the rocker joint using M8 bolts and nuts that were embedded into the 3D-printed joint.
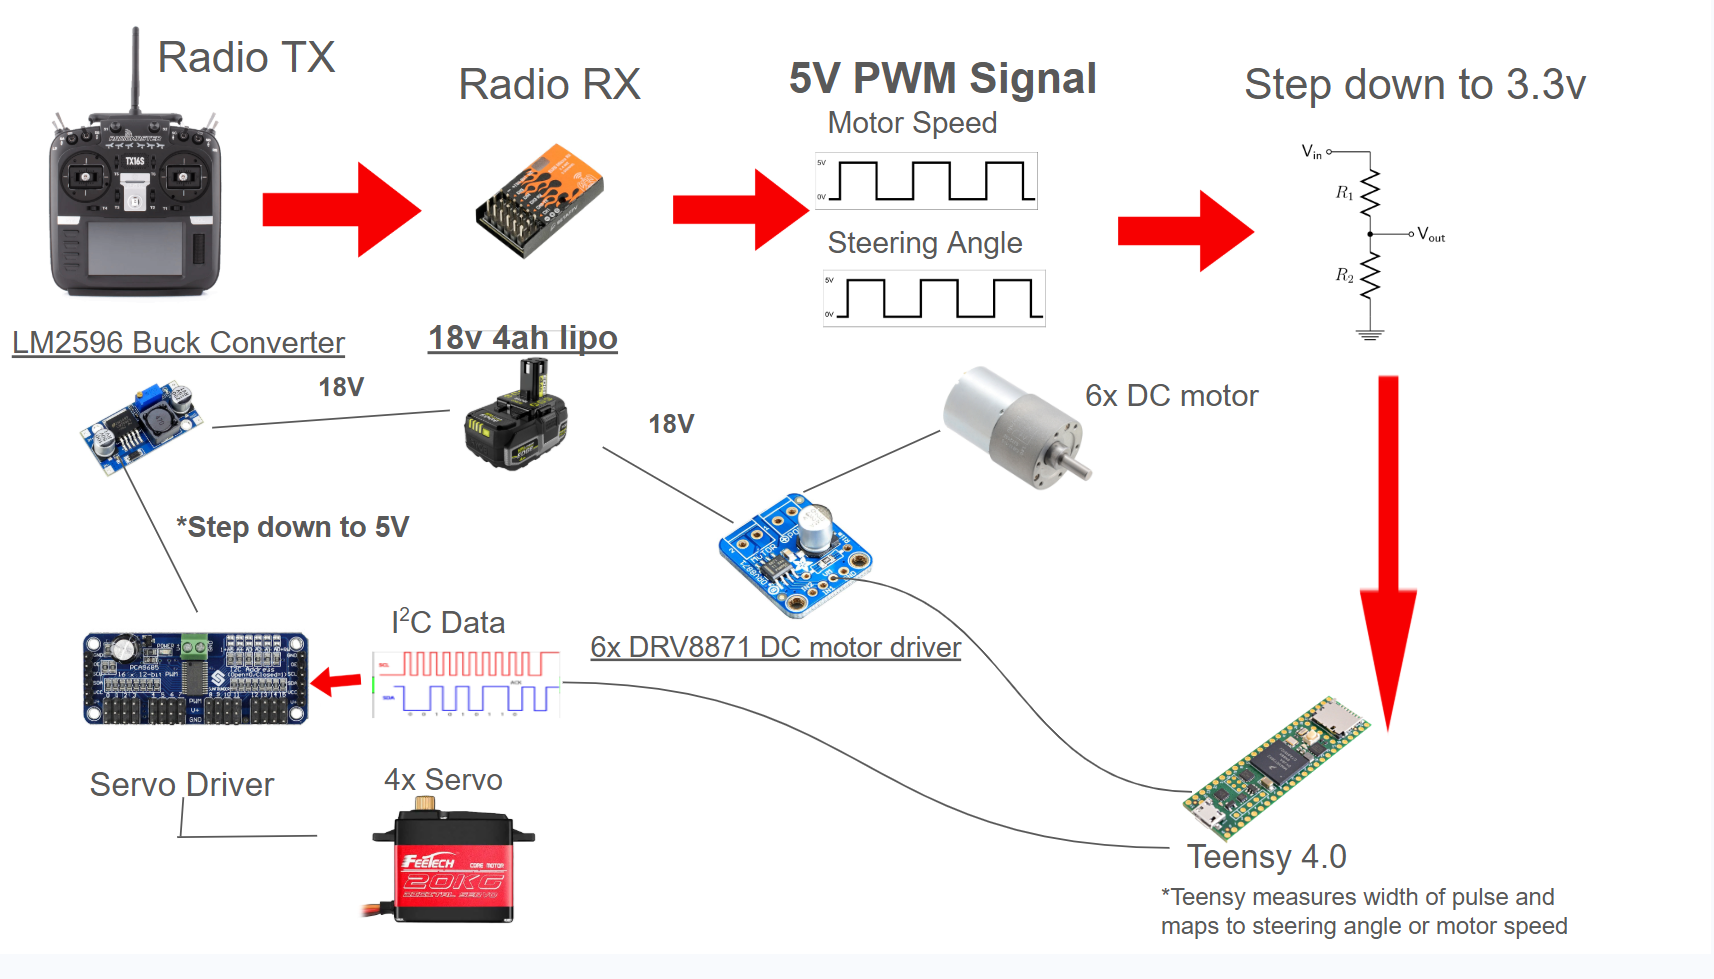
Electronics For the electronics, I simply used a Teensy 4.0 Microcontroller and six DRV8871 motor drivers to control the six DC motors. For power, I did not own a lipo-battery and did not want to spend the money on a battery and charger so I bought a DC power adapter that I could place onto my drill battery. At 18V and 4Ah of capacity, I calculated the total consumption of the electronics to be about 2A when running at full speed (not motors stalling) which would give me approximately 2 hours of runtime on a full charge. For controls, I used a radio transmitter and receiver pair with PWM channels to control the motors and servos on the rover. Additionally, the PCA9685 driver board was used to control the servos using the I2C interface.
There were many issues with this first design. The most significant design flaw was the way that I attached the circular tubing to the rocker and bogie joints on the legs. Since they were circular they were attached a bit skewed and faces that should have otherwise been parallel were not which resulted in the wheels having a slightly negative camber angle. This put lots of stress on the joints that attached the leg to the wheel. Secondly, the overall weight of the rover was quite high, which led to significant deflection of the legs under load.
For the next iteration of the rover, I used square aluminum tubing for both the frame and legs. This tubing was significantly lighter than the alumimum extrusions I used for the frame and just as rigid. I also got rid of the upper part of the frame to further reduce the overall weight of the rover which also meant doing away with the current suspension design. Instead, I pivoted to more of a grashopper design that I believe allows for much mo